Monday, October 23, 2017

Chop Chop!

Greetings Everyone!
  It has been a long time but the Duncan Divas and I are back and looking forward to sharing our new favourite recipes with you. Unfortunately a few surgeries interrupted my life the last three years. Now with my bionic knee and ankle I am right back in my happy place, the kitchen.
  In my recovery time I still managed to get in the kitchen and create some great meals. I have been a long time user of Epicure products and became an Independent Consultant so I could share my love of the products and help to inspire clean and healthy eating. Since all of the products are gluten, nut and MSG free as well as sodium and sugar conscious I can feel better about what I am feeding my family and myself.
  With one Diva now in high school and the other in a rep sport, our weeknights are fast and frantic so the slow cooker is a staple in the kitchen these days. We enjoy the ease of takeout but not all of the hidden ingredients or the cost. A craving for Asian led me to a recipe on the Epicure website for Slow Cooker Asian Chop Suey. I made a few adjustments in terms of seasoning just to spice it up a bit.
  A bag of coleslaw mix, some fresh produce, ground beef and seasonings were all that were needed to assemble this dish in a short time. The slow cooker did the work and we came home to amazing aromas and an incredible dinner.
Ingredients:

  • 2 lbs (900 g) lean ground beef, chicken, or pork, your choice
  • 2 C (500 ml) coleslaw mix
  • 1 C (250 ml) bell peppers, sliced
  • 1 C (250 ml) mushrooms, quartered
  • 1 C (250 ml) celery, cubed
  • 1/2 C ( 125 ml) Miso & Ginger Dressing, prepared
  • 2-3 Tbsp (30-45 ml) Asian Stir-Fry Seasoning
  • 1 C Pho Broth Mix, prepared
The Asian Seasonings from Epicure are among my favourites in the pantry. The original recipe calls for Sesame Ginger Dressing but I am a huge fan of the Miso Ginger. The Miso & Ginger can be mixed with olive oil, orange juice and cider vinegar to make an amazing dressing that I love to use on Nourish bowls or a fresh spinach salad. Asian Umami is a Nutritional Yeast sprinkle that is great on cooked vegetables, in soups, on proteins and in on salads.
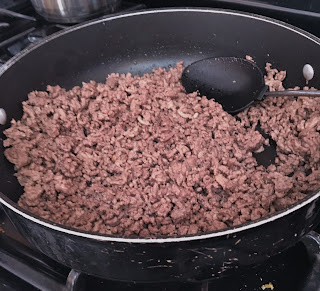
  The recipe calls for ground beef and you can add it to the slow cooker with all the other ingredients and cook from a raw state. I don't like the sheen from the fats in my dishes so I prefer to brown the meat in a skillet first and then drain the fat into a small dish, freeze and then discard. We actually switched to ground turkey which is usually what I use for any meat dishes calling for ground beef and you will find there is much less fat residue when you cook with this instead of ground beef. I wanted to try this with the beef for the blog but it was delicious with the turkey as well.
My favourite part of this recipe is the use of the coleslaw mix which you can purchase at any grocery store these days to save you a lot of time. It took me just a few moments to prepare the peppers, celery and mushrooms.
Everything went into the Crock-pot which I just recently purchased at Costco. It is programmable so that you can set a time and it will automatically switch itself to the warm setting once the cooking is done. Combine all the ingredients and stir gently. Cover and cook for 3 hours on high or 6 hours on low setting.
Three hours later we had a wonderful smelling dinner that just needed some sides.
The recipe suggests using noodles or rice as a side or base for this dish. I like to use my Silicone Steamer with Basmati rice and some seasonings which vary depending on what type of cuisine we are having. One cup of Basmati, 2 cups of water or broth and a sprinkle of Wasabi ginger. 
10  Minutes in the Microwave with the lid on and I get perfect fluffy rice every time with no messy pot to clean. I use this steamer for seafood, pasta, vegetable, potatoes and even popcorn.
Give me a dish and give me chopsticks and I am happy.  The Divas love to have rice when we cook Asian food but I love using rice noodles. Some people boil them but I find they get too overdone so I soak mine in hot water for about 15 minutes before eating.
The finished product served on rice noodles, sprinkled with fresh bean sprouts, chopped cilantro, Asian Umami, sesame seeds and for the extra heat a good drizzle of Sriracha sauce.  We did have leftovers which were great for a teen to reheat before heading off to practice.

Bon Appetit!


* This recipe is great to assemble ahead of time to freeze and cook later. Add all the ingredients except the broth to a large freezable bag, seal it and lay flat in the freezer.
When ready to cook, remove from the freezer at least one hour before cooking. Add contents to your slow cooker, add prepared broth and cover and cook for 3 hours on high or 6 hours the low setting.

Wednesday, August 31, 2016

Butter Me Up With Some Soup

  It's that time of year when summer is winding down and the craziness of fall looms ahead. The days will get shorter, our schedules busier and our leisure time disappearing.  Despite the fact I really do miss the Divas once they start school I enjoy the fall season and all the changes that come with it. I do NOT enjoy the math homework, lunch prep, uniform washing or manic mornings however.
  September is somewhat of a return to normalcy for us and a chance to get back into our groove. With the end of summer also comes the addition of unwanted pounds from all the barbeques and summer sampling. Fall in our area brings abundance of fresh local fruits and vegetables that can be found at the farmers markets and in the grocery stores. This is a great time of year to try new recipes using your local foods.
  This is a fantastic recipe from www.gimmesomeoven.com for Butternut Squash and Apple Soup. It has been a big hit with the Divas and other family members and freezes well. This recipe is great to throw in the crockpot after a bit of prep and you can tackle other chores will it simmers and the wonderful fragrance fills the air. You can make this vegetarian by switching the chicken broth for vegetable broth and adjust the heat levels to suit your tastes. This is also dairy free so is a regular item on our Paleo menu plan.


Ingredients:
 
  • 2 cloves garlic, peeled and minced
  • 2 cups vegetable stock (we use Organic Chicken stock)
  • 1 carrot, peeled and diced
  • 1 Granny Smith apple, cored and diced
  • 1 medium (uncooked) butternut squash, peeled, seeded and diced
  • 1 sprig fresh sage
  • 1 white onion, diced
  • 1/2 teaspoon salt, or more to taste
  • 1/4 teaspoon freshly-ground black pepper, or more to taste
  • 1/8 teaspoon cayenne, or more to taste
  • pinch of ground cinnamon and nutmeg
  • 1/2 cup canned coconut milk
  • (optional garnishes: extra coconut milk and cayenne)

  •  
    
     
      You can make this recipe with raw squash but I love the taste and smell of roasted squash so I added an extra step before cooking. Preheat the oven to 400 degrees and peel, seed and cube the butternut squash. This squash is tough to cut so this duty is left up to mom while the Divas take care of some of the other preparations. I like to mix the squash with just enough olive oil to coat, salt, pepper, cinnamon, garlic powder and poultry seasoning. Spread on a baking sheet and cook for 30 minutes.
     
     
    While the squash is roasting take the time to prepare your other ingredients for easy assembly in the crockpot.

     
    I do tend to have a wee bit of an addiction to kitchen gadgets as you would see if you peered into my overflowing drawers and cupboards. I also like some of these because it allows the Divas to help me without the use of knives.
     
     
     This is a garlic press I found at Kitchen Stuff Plus that is easy to use, easy to clean and saves your hands from smelling like a vampire repellent.

     
    This is likely the favourite gadget of the Divas that we have in our kitchen. With a bit of muscle they can make their own apple wedges. They love to use this when the apples are at the peak of season and make a simple apple crisp for dessert.
     
     
    Add vegetable or chicken stock, garlic, carrot, apple, butternut squash, sage, onion, salt, pepper, cayenne, cinnamon and nutmeg to a slow cooker.  Toss to combine.
    Cook for 6-8 hours on low, or 3-4 hours on high, or until the squash is completely tender and mashes easily with a fork.

     
    Stir in the coconut milk and use an immersion blender to puree the soup until smooth.  I usually make a double batch of this soup so I like to use my blender or food processer to puree the soup. It can be very hot so use caution or allow the mixture to cool before you blend.  Depending on the size of the squash you may find you need to add more liquid to the soup in order to puree. I like to use a whole can of coconut milk as opposed to half a cup but you can also you more stock or water. Taste, and season with additional salt, pepper and cayenne if needed.
     
     
    When following our Paleo meal plan we like to pair this soup with a protein like chicken breasts and some fresh fruit. This soup was topped with toasted pecans, fresh cilantro and hot sauce.


    If you prefer a vegetarian version we made a cold broccoli and pumpkin seed salad and added fresh apples from our local orchard. We garnished the soup with pecans and shredded coconut so feel free to use your imagination!

    Bon Appetit


    Wednesday, August 24, 2016

    Put Some Mussel Into It

      On our road to better health we recently completed a round of Whole 30. This is a month where you eliminate all dairy, grains, legumes, sugar, alcohol and MSG to reset your system. What's left to eat?  Proteins, vegetables and fruits! Trying to be creative with meals can be a challenge and food prep is key so you don't grab any of the forbidden foods in a moment of hunger.  Aside from weight loss I noticed a lot of NSV which are No Scale Victories. Energy levels were through the roof, I slept better than I have in years and I noticed great changes in my hair and skin and nobody had any stomach issues. We will be getting back on track for another round once school is back in and we return to some sense of normalcy.
      Luckily I love cooking and trying new recipes. I also have a family that is willing to try mom's concoctions and also help with the shopping and preparation. This dish caught my eye when I was looking for something that would taste like a dinner out and pack a lot of flavour that wouldn't cost us a lot. I found this Shrimp and Mussel Chowder on Paleo Leap which is full of amazing meal ideas for those following a Whole 30 or Paleo lifestyle. One of my Divas loves seafood and the other is a carnivore so this meal was a treat for three out of four of us. Being a mom means of course making the meat lover her own separate dinner.
      This recipe was easy to make and had a bit of sweet from the coconut milk and a bit of heat from the curry paste. I toned down the heat a bit for the Diva but it still had a wonderful taste and the aroma was heavenly. The mussels we bought at our local store for $5.99 and this made a huge pot with leftovers. A recent order of mussels at a restaurant cost us $15 and was an individual portion.  With back to school around the corner and two daughters that are growing like mad we are happy to save money anywhere we can!
     
    Ingredients:


  • 1 lb. raw shrimp, peeled and deveined
  • 2 to 4 lb. mussels, rinse thoroughly
  • 2 sweet potatoes, cut into small cubes
  • 2 carrots, thinly sliced
  • 1/2 lb. pancetta, cubed*
  • 1 red onion, thinly sliced
  • 1 celery stalk, thinly sliced
  • 3 garlic cloves, minced
  • 2 tbsp. chili paste
  • 2 cups coconut milk
  • Fresh parsley, minced
  • Sea salt and freshly ground black pepper
  •  
     
    *I am not a big fan of pancetta so used several slices of thinly sliced proscuttio which got nice and crunchy and added great flavour to the vegetables.
     
     
    Bring a large saucepan with 4 cups of water to a boil. Place the cubed sweet potatoes and sliced carrots in the boiling water for 4 to 5 minutes. Using a slotted spoon, remove the sweet potatoes and carrots and set aside, but keep the water in the saucepan.


    While your carrots and potatoes are simmering prepare your vegetables. In regards to saving money we always keep our eye out for frozen shrimp when it is on sale and buy a few packages for stir fry and pasta dishes. If you have never made mussels at home don't be intimidated as they are easy to prepare. This is a great link that will explain how to rinse and debeard the mussels before you cook them:


    In a second saucepan, cook the prosciutto and stir for about 4 to 5 minutes.
    Add the onion, garlic and celery, and cook for another 2 to 3 minutes.
    Add the cooked carrots, sweet potatoes and chili paste and stir to combine ingredients. Season to taste.
    If you are making this for company I would suggest using one tablespoon of the chili paste. You can always add more upon serving but it's best to not have your guests begging for pitchers of water.

     
    Add the shrimp and cook until no longer pink, roughly 2 to 3 minutes.
    Pour in the coconut milk, and stir. Then, add 2 cups of the potato water, and stir again
     
     
    Bring to a soft boil and add the mussels. Cover the saucepan and simmer for 4 to 5 minutes
     
     
    Spoon into bowls and top with fresh parsley. We love to add lime wedges to ours as well.
     
     The biggest challenge about this dish was not having a huge crusty baguette to go with it since we were having this while following our plan. If you are carbohydrate obsessed like my husband the baguette or grilled pita go wonderfully with this dish so you can get every last drop of sauce. I was happy with a big spoon for the sauce and some fruit to beat the heat.
     Keep this recipe in mind for an easy and visually appealing meal to serve to guests or to make for you on a cosy night in with family.
     
    Bon Appetit


    Tuesday, December 1, 2015

    One Pot Wonderful

    
    There is a great new trend happening in the culinary world that I am a big fan of. This new phenomena is called One Pot Cooking. The concept is that all the ingredients go into one pot or skillet and the entire meal is cooked in one container. No multiple pots and pans to shuffle around on the stove and less mess is best in my house! This recipe is fun for us to make with the Divas as we aren't dealing with a fry pan and they are comfortable cooking in a big pot with Mom's supervision. Our favourite recipe for Chili Mac and Cheese comes from www.damndelicous.net This is a great meal to make ahead and freeze or have ready to reheat for a quick dinner or a delicious, warm lunch in a thermos.
     Ingredients:

    1 tablespoon olive oil
    2 cloves garlic, minced
    1 onion, diced
    1 pound ground beef or turkey
    4 cups chicken broth
    1 (14.5-ounce) can diced tomatoes
    3/4 cup canned white kidney beans, drained and rinsed
    3/4 cup canned kidney beans, drained and rinsed
    2 teaspoons chili powder
    1 1/2 teaspoon cumin
    Kosher salt and freshly ground black pepper, to taste
    10 ounces uncooked elbows pasta
    3/4 cup shredded cheddar cheese
    2 tablespoons chopped fresh parsley leaves
    In many of the one pot recipes you will see the term "Dutch Oven" used as the main cooking applicance. Below is a definition from Wikipedia to explain what this is. This is not necessary for making this chili or any of the other soups and your trusty  soup pan or stockpot will work just as well. I do NOT in my vast culinary collection own such a coveted pot yet but I MAY just have a coupon for Kitchen Stuff Plus hiding in my wallet.
    (Please don't tell my husband.)
    
    A Dutch oven is a thick-walled (usually cast iron but also ceramic and clay) cooking pot with a tight-fitting lid. Dutch ovens have been used as cooking vessels for hundreds of years. They are called casserole dishes in English speaking countries other than the United States ("casserole" means "pot" in French), and cocottes in French.
    Heat olive oil in a large skillet or Dutch oven over medium high heat. Add garlic, onion and ground beef or turkey.
    Cook the meat until browned about 3-5 minutes. Crumble the meat while cooking to break it up evenly and be sure to drain the excess fat. This usually means a treat on our dog's kibble so she is a big fan of chili night!
    Stir in chicken broth, tomatoes, beans, chili powder and cumin; season with salt and pepper, to taste.
    
    
    Despite the fact the Divas are great eaters, none of the ladies in this house like BIG chunks of tomatoes in our soups or stews. Aylmer sells petite diced tomatoes that are seasoned and perfect for adding to your recipes. There are a few varieties of flavours so pick up a few cans when you are next at the grocery store so you have them on hand to throw together a quick dinner. 
    Bring to a simmer and stir in pasta. You can use shell pasta or macaroni but my favourite is the Ditali pasta as it doesn't expand too much and over power the chili. You will note the recipe calls for 10 ounces of pasta. This amount is adjustable depending on how much you would like your recipe to resemble a soup or a chili. We call this our Chili Stoup as it is thick and a combination of soup and stew depending on how much pasta you add.
    Bring to a boil; cover, reduce heat and simmer until pasta is cooked through, about 13-15 minutes.
    Remove from heat.
    
    Top with cheese and cover until melted, about 2 minutes.
    We like to top our "Stoup" with green onions, some shredded cheddar and sour cream. For Dad and I there must be a good shake of red chili flakes for some heat.

    The preparation work in this recipe is minimal and at the end of cooking you will only have one pot (or a beautiful Dutch oven) to clean along with your ladle. Get some fresh dinner rolls or make some garlic bread and dig into this hearty and comforting soup!

    Bon Appetit

    Tuesday, October 27, 2015

    BOOtiful Halloween Bark

    A decadent treat that is fun and festive to make with the kids and to get you into the spirit of Halloween!

    Despite the fact that our household will be teeming with candy this time next week, we wanted to make a special Halloween treat together. I am not a baker but the girls do love to make muffins, cookies and of course the occasional sweet treat. I saw a few photos of the Halloween Bark on Pinterest and with Dad away for the day it seemed like a fun activity to do with a Diva and get us into the spirit of Halloween. With only a few ingredients and a big imagination this was gooey, messy, tasty and fun!
    Ingredients:

    3-4 cups chocolate chips
    Assorted candy

    There is no limit on the variety of candy you can use in your bark. We hit the Bulk Barn and a few double
    digits ($) later we came home with our loot. We chose semi sweet chocolate chips and we did a second batch using milk chocolate chips.I saw the candy eyes on a few recipes and these were a must have for our bark. The giggles of putting these into the melted chocolate were priceless and we have leftovers for the day I brave cupcakes! You can use broken candy bars, pretzels or anything that appeals to your sweet tooth. We chose Candy Corn, Chocolate Peanut Butter Minis, Jelly Beans and sprinkles for the Duncan Bark
     
    The youngest Diva who was the star meatball maker in my last blog had a soccer game and homework today. That meant an opportunity for me to have some one on one with my eldest, otherwise known as Diva Senior. Her Nana bought her this apron last year for Christmas and she loves to put it on the help out in the kitchen.
    All you need to make the bark is a cookie sheet and parchment paper which you can buy in individual sheets as shown above or in rolls. It really is a life saver when baking or cooking and means a lot less work when cleaning your baking trays after.
    The first step is to melt the chocolate. You can use a double boiler or the microwave. I have yet to perfect melting chocolate in the microwave even though our model has a specific setting for softening chocolate and butter. I have wasted many a good chocolate trying to use this method and need to treat my chocolate in a more humane way.  We use our pot and steamer insert and place a glass bowl over top of simmering water.
     You can adjust the temperature as needed to melt the chocolate but you want to do it slowly so it does not harden. Continuous stirring is key and be prepared for some sticky fingers while stirring the pot. Once the chips are melted you will see a nice shine to the chocolate and it's time to pour! 
    Be careful when lifting the bowl from the steamer basket if you are using this method since the bowl may be hot and water can collect on the bottom of the bowl and spill onto the baking sheet. Using a sturdy spatula pour the melted chocolate onto the parchment paper.
    Using a spatula spread the chocolate to an even thickness. A helper is a big bonus for this step as trying to hold the parchment down and spread the chocolate could challenge an octopus.
    
    Now the FUN part!! Decorating! There did need to be a few mild suggestions to NOT shovel all the candy into the mouth but to instead put it in the chocolate. This was a lot of fun to do and you can let the imagination go wild.
    Once you have finished decorating your masterpiece place the cookie sheet into the fridge and allow to set until hardened, about half an hour. Once the bark has set use a heavy knife and a bit of elbow grease to cut the bark into pieces.
     When we cook we share. Bulk Barn had these amazing containers we are using to give some gifts in. Wonder who will find one in their mailbox??

     
    The finished product. After I assured the Divas that we were keeping SOME of the bark ourselves, the rest has made its way into gift boxes to share with neighbours and friends. We have a lot of people to thank that have helped us over the year while I have been recovering from two knee surgeries! Hopefully this sweet thank you will be a hit!
    This bark is also a good way to use up candy that is received for Halloween. Last year we melted our Jersey Milk and Aero bars and made chocolate dipped strawberries for a party.
    I hope you all have a safe and fun Halloween and if you find some time on a rainy Sunday get out the chocolate and get in the kitchen and make some of this Bootiful Bark!

    Happy Halloween!


    Monday, October 26, 2015

    Cloudy with a chance of Moroccan Meatballs

    The leaves are falling, the air is getting crisper and the hours of sunlight diminishing. I personally love autumn and look forward to cosy nights together with the family. It also gives me more time in the kitchen to bring out the soup pot and find new dishes to make together with the Divas.

    The Divas are not big sandwich eaters so trying to come up with creative and healthy lunches that will go in the thermos on cold days is a challenge. I am not a fan of canned soups because of all the sodium and ingredients. I also enjoy involving the girls in meal selection and working together in the kitchen to create nutritious meals. Italian Wedding Soup is a favourite of both girls so we went on a hunt to find a similar recipe that was healthy and easy to make. I found a great recipe for Moroccan Meatball Soup with Couscous from site called littlespicejar.com. The spices in this recipe are amazing and we created a soup that smelled delicious and was a BIG hit for flavours.
    Ingredients:
     
    Meatballs:
    1 teaspoon ground coriander
    1 teaspoon ground cumin
    ½ teaspoon curry powder
    ½ teaspoon dried thyme
    ¼ teaspoon turmeric
    ⅛ teaspoon ground cinnamon
    ⅛ teaspoon nutmeg
    ¼ teaspoon chili powder
    salt and pepper to taste
    2 tablespoons tomato paste
    1.5 lb. ground lamb or beef
    We shied away from eating ground beef and instead we use ground turkey in all of our recipes calling for beef. We are lucky to have deal that comes up often on Wag Jag where we can purchase 12 pounds of ground turkey in individual packages for $29.00 from a local meat store. They are shown above and easy to store in the freezer and very lean meat.
    As part of my fall/spring cleaning I like to refill all my jars with fresh spices. The Bulk Barn is a great way to buy them and easy to purchase small amounts. I treated myself to a new spice rack from Kitchen Stuff Plus since our old one was very large and took up too much room on our prep counter. 
    My favourite thing about this blog is that it became a way to share our tried, tested and approved recipes and get the Divas into the kitchen with me for some quality time and help with making meals. The girls have a love of cooking and we have fun putting on some music and creating great meals together.  Making these meatballs was messy but worth it. It was also a great way to teach about proper food handling. I spent January of 2000 in a hospital in Mexico with a case of salmonella and typhoid. What a way to celebrate the Millennium! Since then I have taken beginner chef courses and worked in many restaurants so I am a bit compulsive about safe found handling. 
    To make your meatballs begin by preheating the oven to 375ºF and place your rack in the centre of the oven. Line your baking sheets with parchment paper. In a medium bowl, combine the spices, salt and pepper. Mix with the spoon. Add the tomato paste and ground meat and mix using your hands. I sprayed olive oil on our hands before and it helped with the rolling process. Scoop about 1 teaspoon of the meatball mixture and form a ball, place on the prepared baking sheet. Bake the meatballs for about 10-12 minutes or until baked through. The aroma of these cooking is heavenly!
    
    The youngest Diva did a great job and we rolled two cookie sheets full to pop in the oven. I would make these meatballs and also use them in a light sauce and serve with rice pilaf for another meal.
     
    Ingredients:
     
    Soup:
    8 oz Israeli (pearl) couscous
    3 tablespoons olive oil + 2 teaspoons
    3 shallots, minced
    8 cloves garlic, minced
    4 cups chicken or vegetable broth
    3¾ cups water
    Chopped mint or parsley, for serving
    One of my MUST HAVE kitchen gadgets is a weigh scale. This is one I got from Starfrit and is a lifesaver when recipes call for ounces, grams or pounds.
    
    While meatballs are baking, heat 2 teaspoons of olive oil in a small saucepan over medium heat. When heated, add the couscous and allow the couscous to toast for just 1-2 minutes. You'll know it's done when you can smell the toasty aroma.  If you have never cooked with couscous before it is very easy to prepare and a nice change from rice and potatoes. This form of couscous is called Israeli and is available at the Bulk Barn.
    
    
    Add a pinch of salt and 1¾ cups water, allow to come to a boil, reduce the heat to low, cover, and allow to cook for 8-10 or until water is absorbed
    In a large pot or dutch oven, heat the 3 tablespoons of oil oil over medium-high heat. Add the shallots and garlic and allow to sauté for about 1 minute.
    Before you ask what the heck is a shallot here is a description from the Good Housekeeping site:
    Shallots, like onions and garlic, are a member of the allium family, but their flavor is richer, sweeter, yet more potent. Like garlic, they grow in clusters, with several bulbs attached at the base. You'll recognize them by their coppery skins and their off-white flesh, which is usually tinged with magenta. Shallots add a great depth of flavor to pan sautés, soups, sauces, and stews, and pair especially well with chicken and fish. To substitute one for the other in recipes, use half the amount of shallot that you would onion.
    
     Add in the chicken broth along with the remaining 2 cups of water and bring to a boil. Reduce the heat to low and add in the meatballs along with couscous and continue to simmer for 10 minutes. We like to add chopped spinach to ours to get in some extra iron and calcium. For those of you with picky diners you can omit this ingredient.  Remove the pot from heat, garnish with a handful of chopped mint or flat-leaf parsley, if desired.
    
    We have been very fortunate to have a Cobs Bakery open up around the corner and their rolls and baguettes are incredible and baked fresh all day. The Divas ride to the store together to pick up dinner rolls and somehow apple caramel scones always seem to come home with them as well :)
    This soup does freeze well and was a big hit for lunches with the girls. We hope you enjoy it as much as we did!
     
    Bon Appetit!